Azure VMware Solution “Ingredients”: Inspect Internet Egress with Network Virtual Appliance in Azure Virtual Network
Use Case
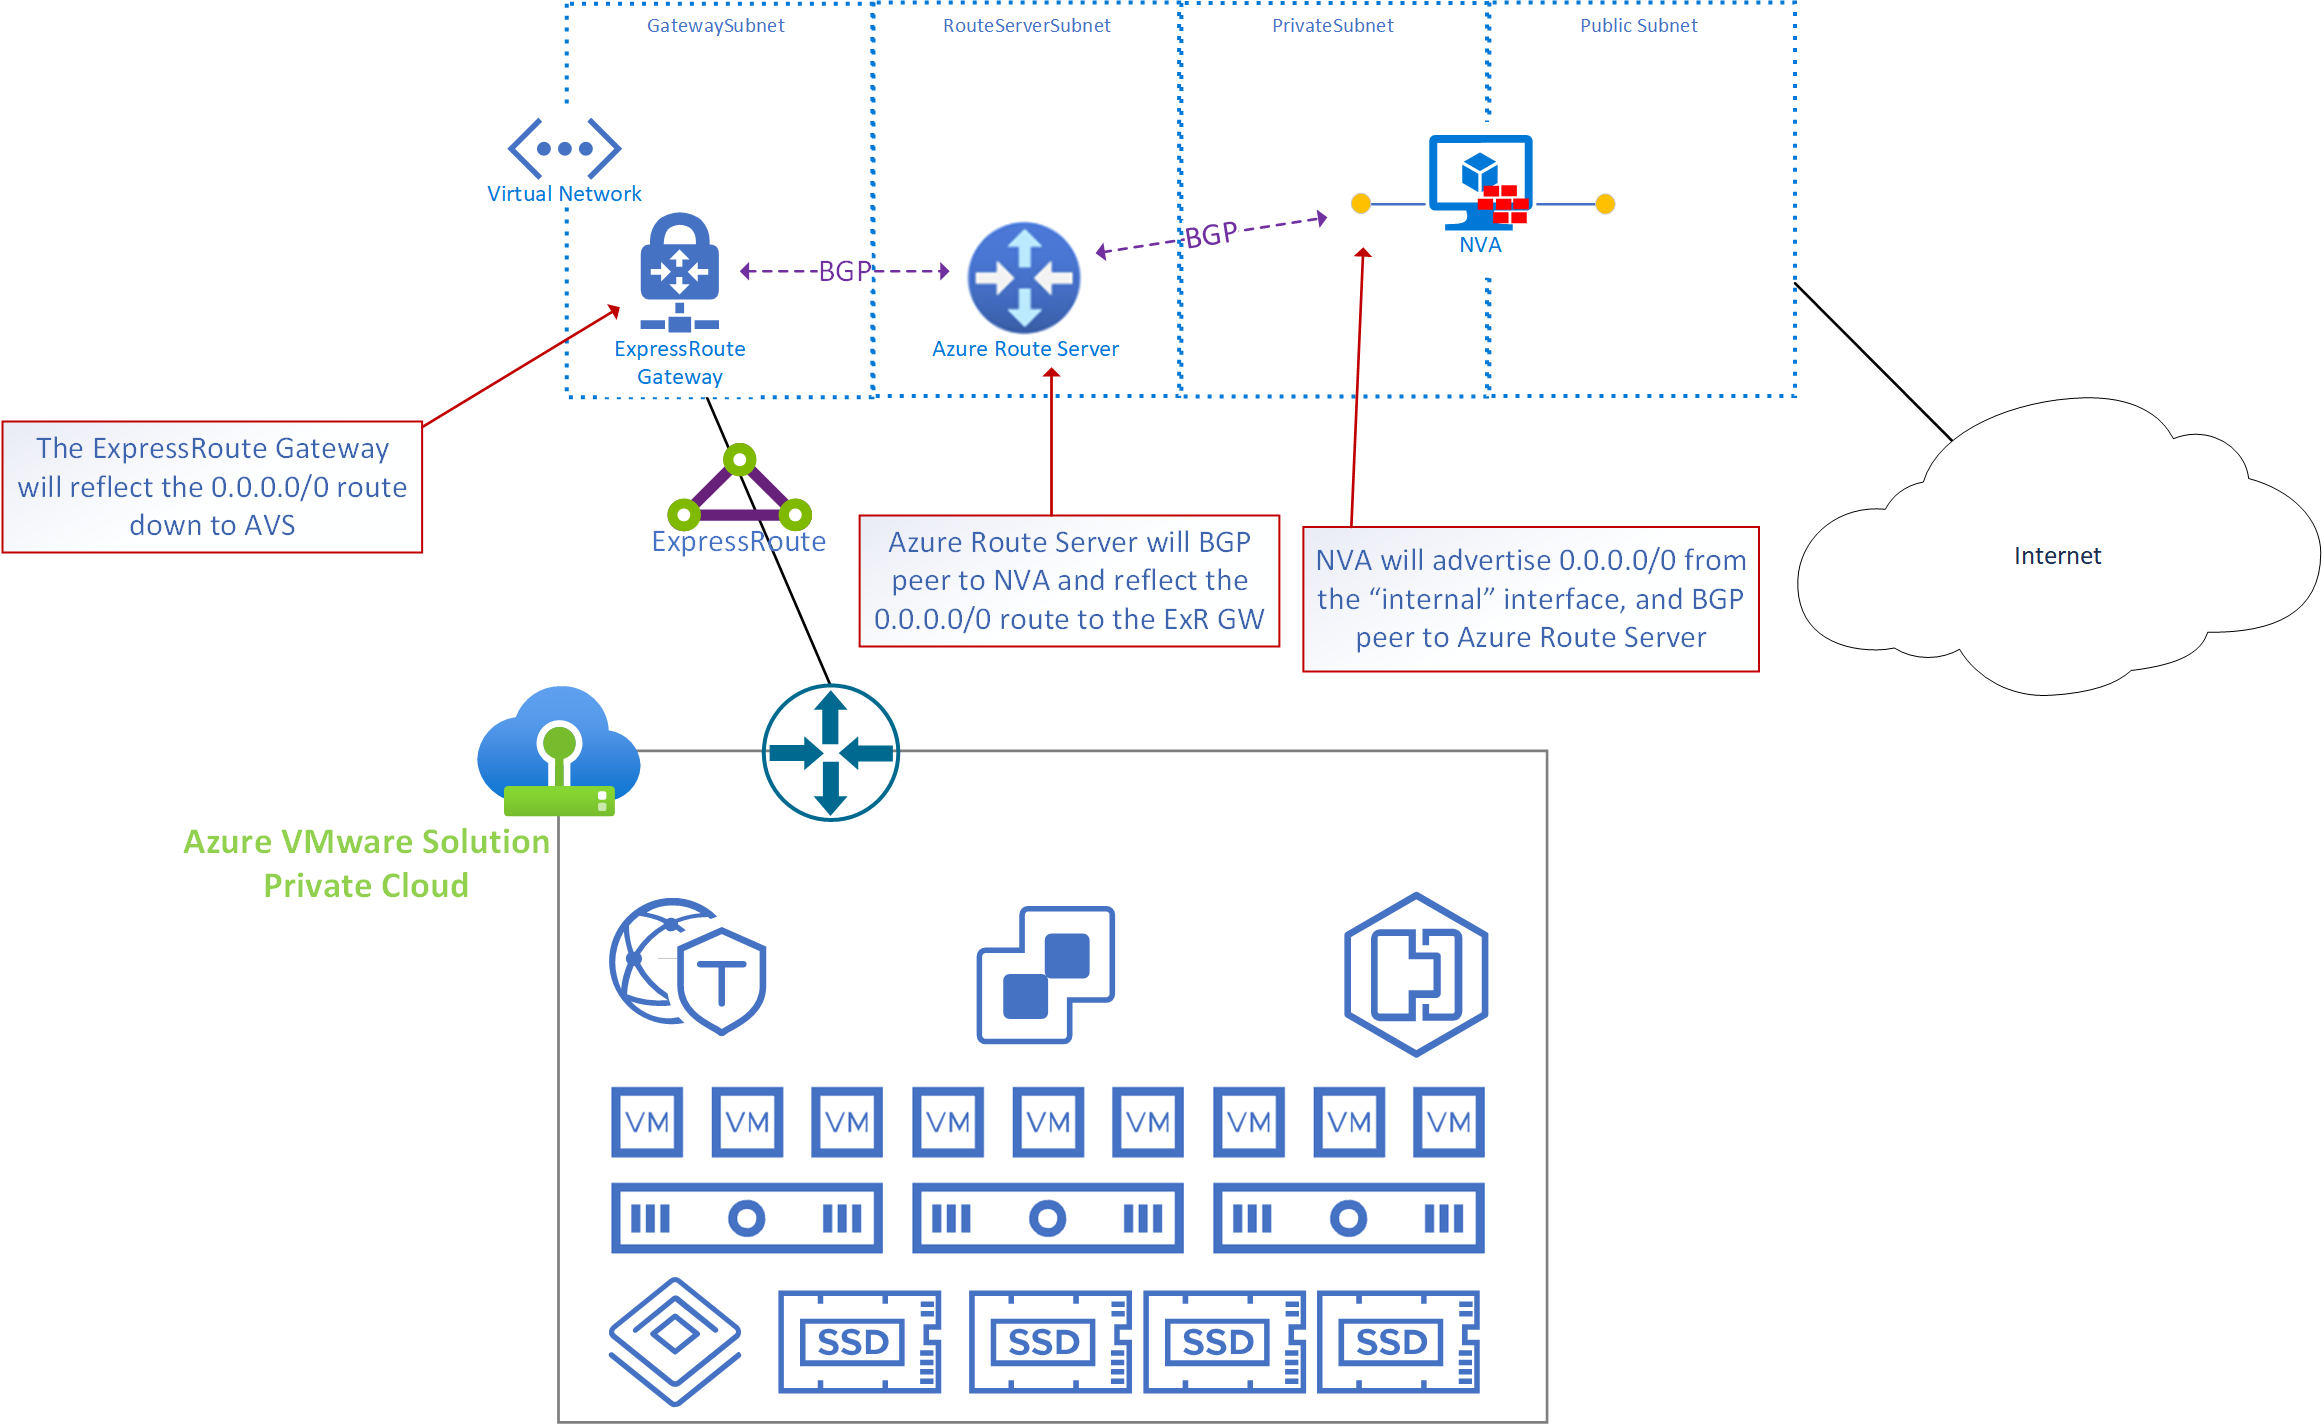
Inspect Internet Egress traffic (Internet destined traffic which originates from a VM within the AVS private cloud) using a 3rd party firewall / NVA in an Azure vNet
General Information
- In the graphic the NVA, Azure Route Server and AVS ExpressRoute gateway are in the same virtual network, however, the NVA could exist in any virtual network. If there is IP connectivity from the RouteServerSubnet to/from the subnet where the “internal” interface of the NVA is, BGP peering can be established.
- Azure Route Server is used because the only way AVS routes can be manipulated is by learning routes via BGP.
- IMPORTANT: The AVS ExpressRoute may be connected to the same ExpressRoute Gateway where other ExpressRoutes connect (it’s common to share the ExpressRoute Gateway with the on-premises ExpressRoute). Any environments which connect to the ExpressRoute gateway will learn the default route which is being advertised by the NVA. Therefore, the route must be filtered by the on-premises edge.
Implementation and Configuration
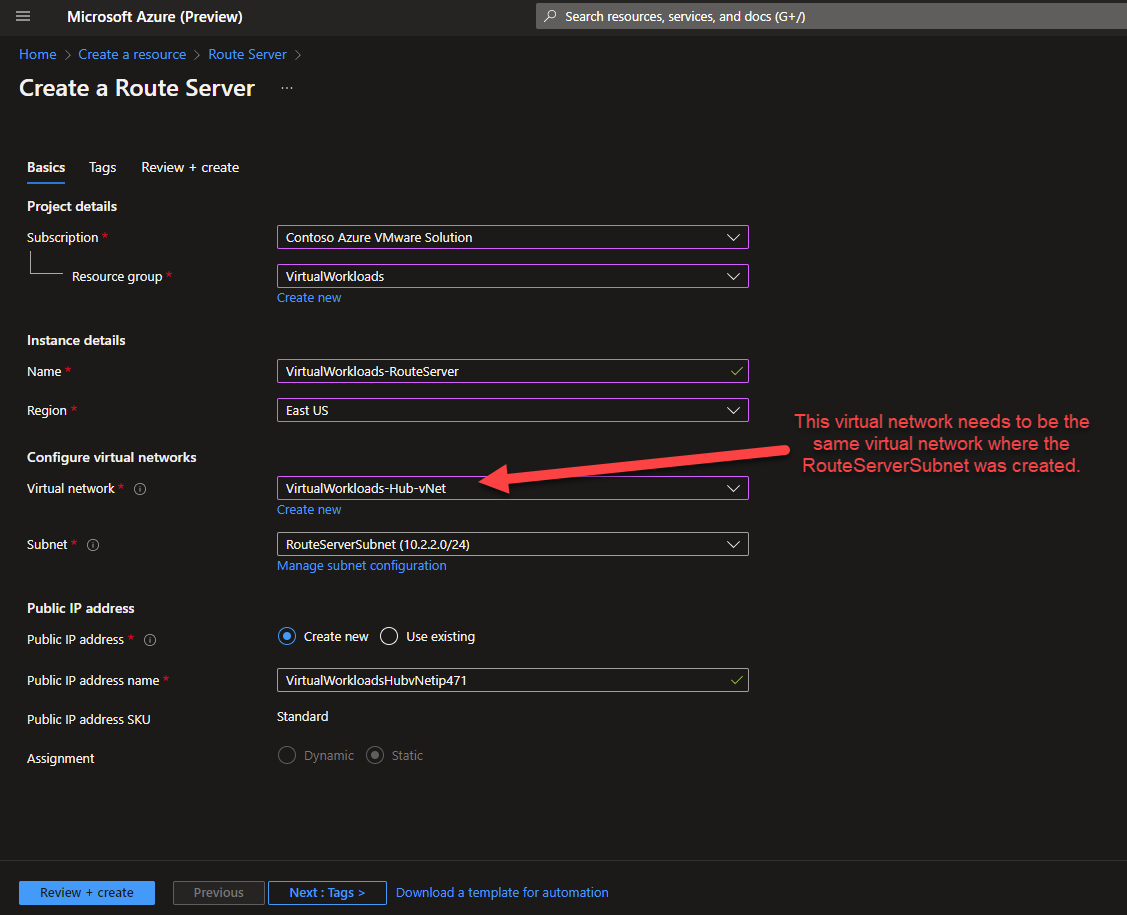
- In the Virtual network where the AVS ExpressRoute is connected create a subnet called RouteServerSubnet. The subnet must be /27 or larger. For details on how to create a subnet see this link.
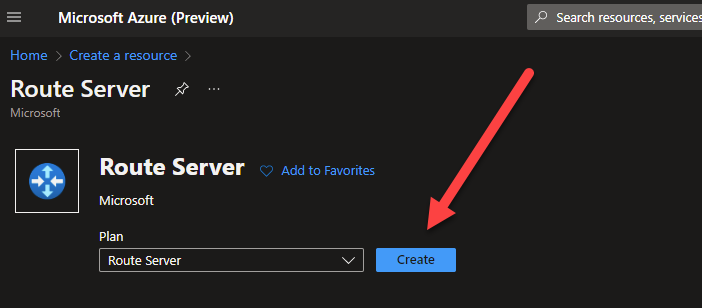
- Log into the Azure portal and search for Route Server, choose Create.
- Input the configuration parameters, the critical item is the Virtual Network, make sure to choose the virtual network where the RouteServerSubnet was created.
Then choose RouteServerSubnet for the Subnet configuration.
Move to the next screen, configure any Tags, then deploy.
Deployment may take 15-20 minutes.
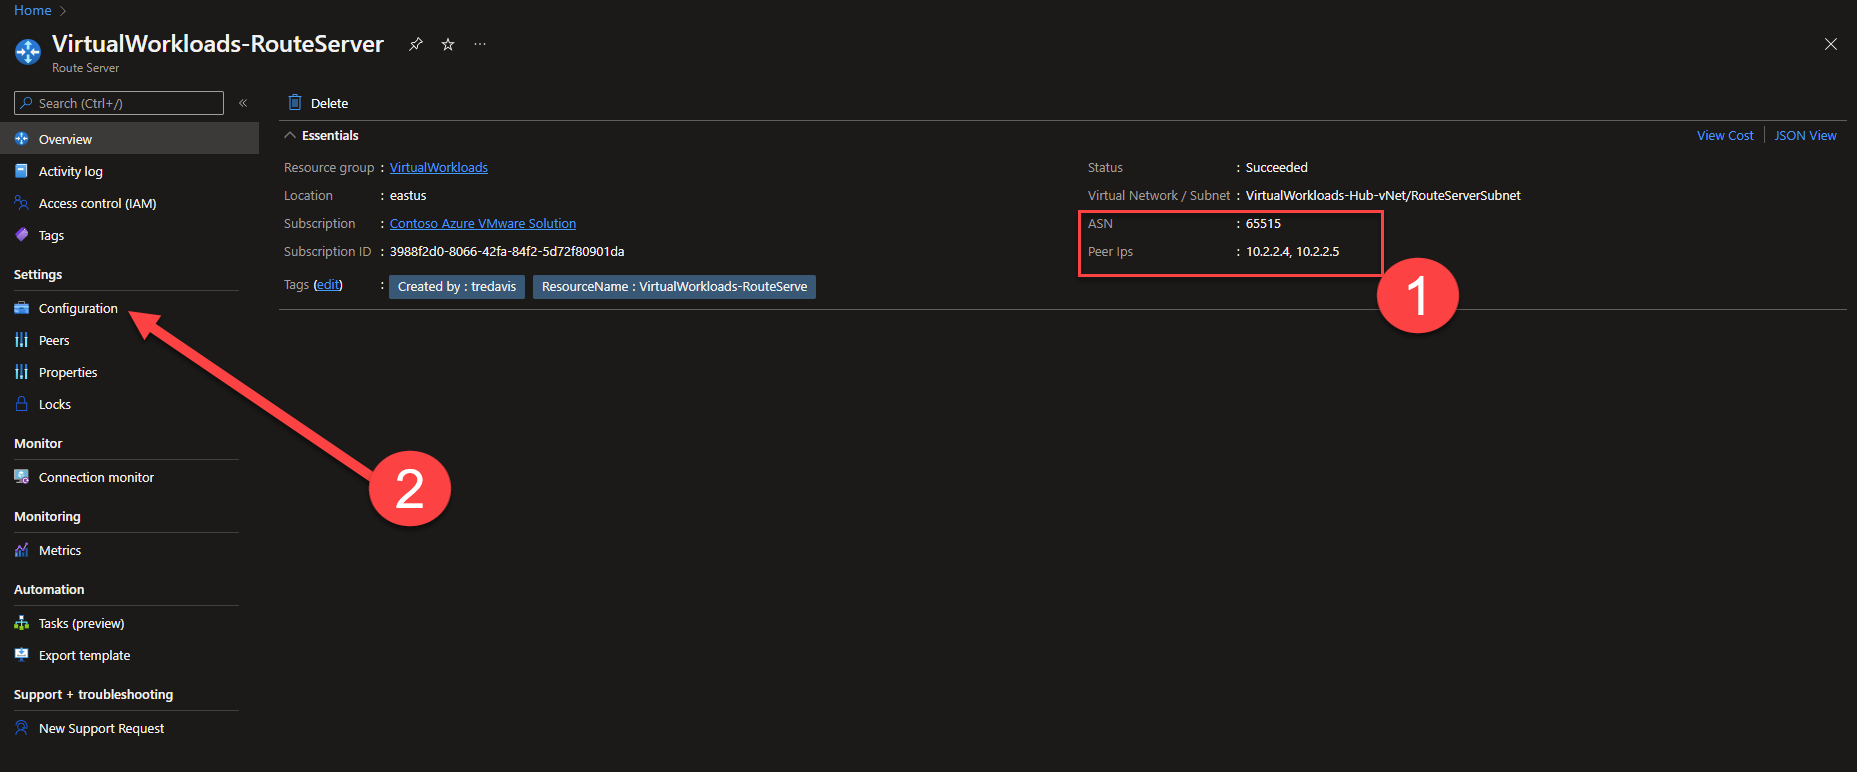
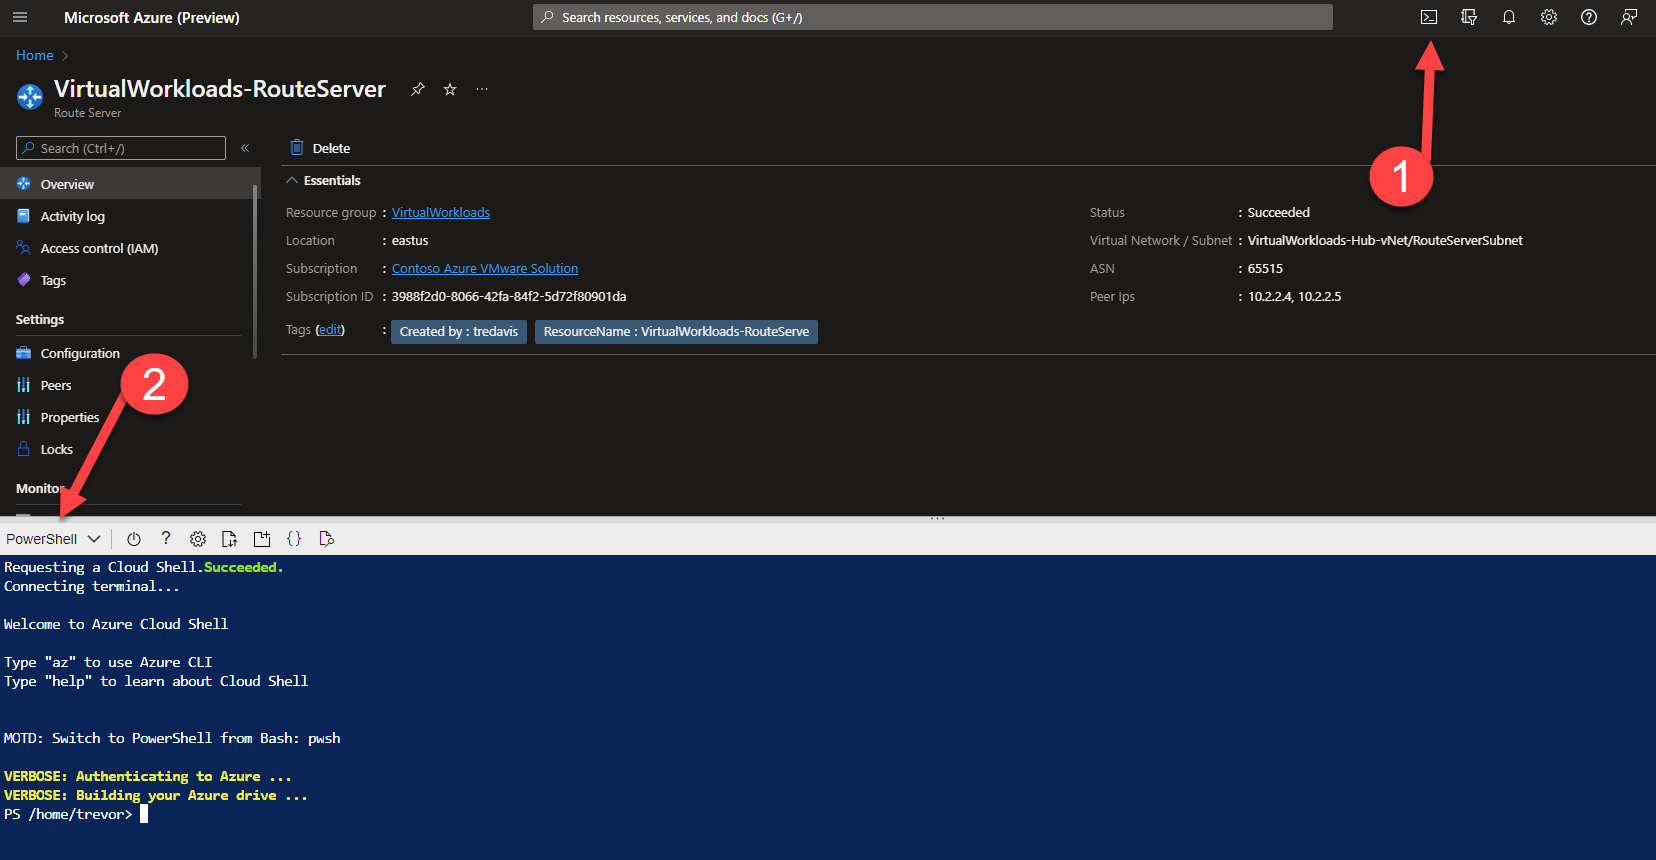
- Now that the Route Server is deployed, make note of the ASN and Peer IPs, you will need those in later steps when you are configuring your NVA to peer w/ Route Server.
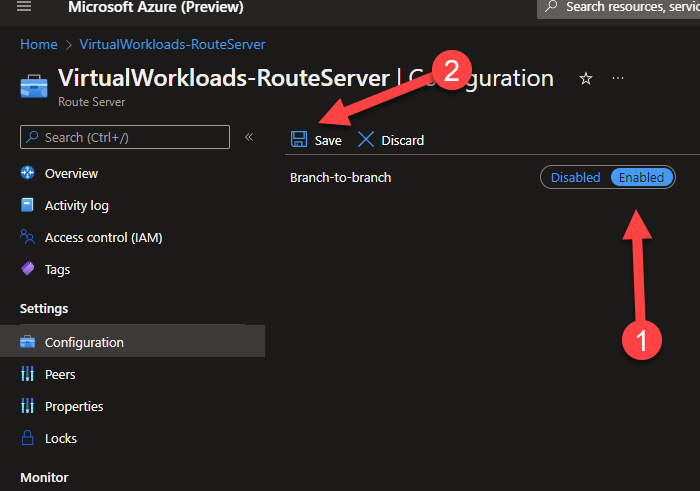
Navigate to the Configuration item in the blade on the left.
- In the configuration screen change Branch-to-branch to Enabled, then press Save.
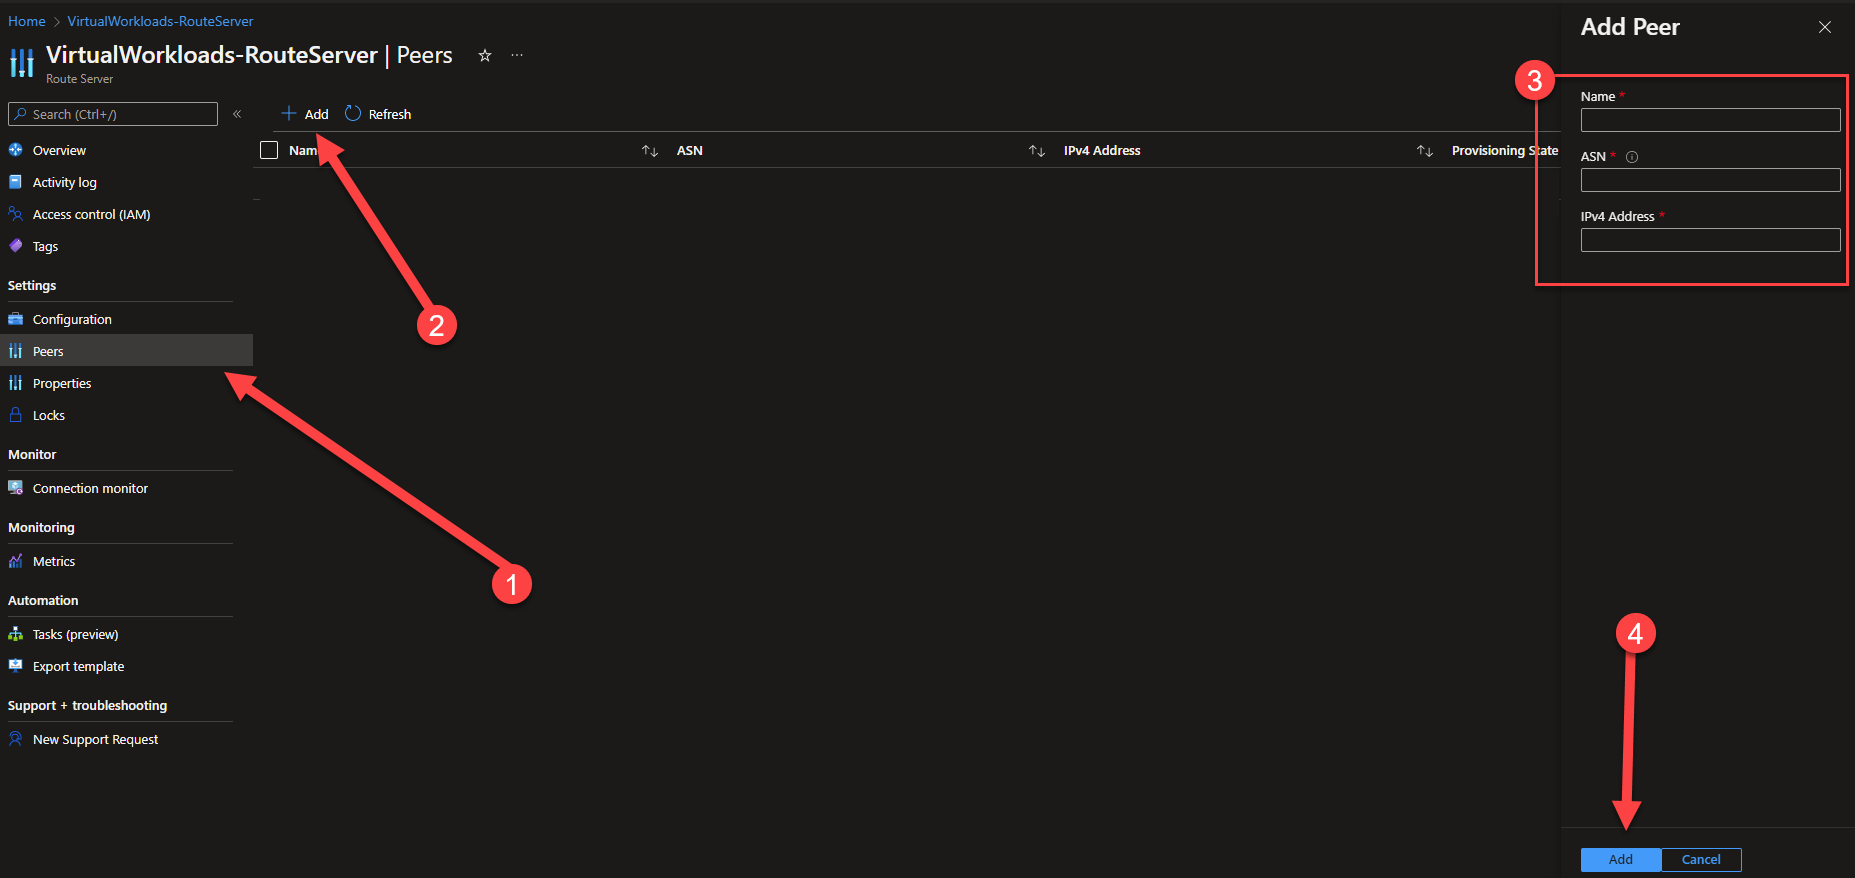
- Navigate to the Peers configuration screen, and press Add.
You will see a screen similar to what is shown here.
At this point you will need to enter the information about the NVA you will be peering the route server with. You will need to gather that information. Enter the information as follows:
Name: Just a friendly name to ID what you are connecting to.
ASN: The ASN of the NVA you are peering the Route Server with.
IPv4 Address: The IP address of the NVA’s interface which will be peering with the Route Server.
If any configurations must be done on the NVA prior to the Route Server establishing a peering relationship, complete those now.
Press Add.
- You should now see the Peer show up as Succeeded.

- Now, go to the NVA and configurate it appropriately to peer w/ the Route Server. Remember, you will need to ASN and IPs which you should have retrieved in step 4.
IMPORTANT: When this step completes, the routes which the NVA is advertising will also be reflected to any vNets which are connected to the vNet where the Route Server is deployed.
- Open Cloudshell, and change the type to PowerShell.
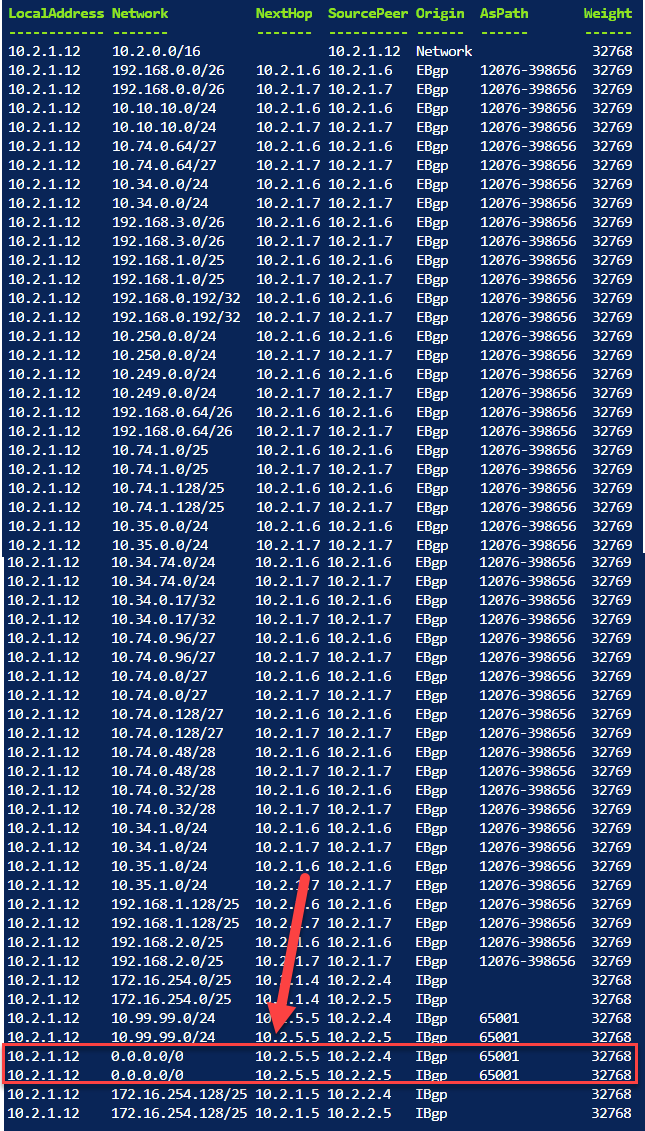
- Execute this command. It will test to see if the 0.0.0.0/0 route is being sent to the ExpressRoute Gateway.
Get-AzVirtualNetworkGatewayLearnedRoute -VirtualNetworkGatewayName <Virtual Network Gateway Name In the vNet with RouteServer> VirtualWorkloads-ExR-GW -ResourceGroupName <Resource Group Name where ExpressRoute Gateway is Deployed> | ftYou should see output similar to what is shown below.
The critical item you are looking for in the list is the 0.0.0.0/0 route showing the NextHop IP as the NVA’s IP which is peered with the RouteServer. In this example the 0.0.0.0/0 route NextHop is 10.2.5.5, this IP is the NVA which is peered w/ RouteServer.
- At this point, the workloads in Azure VMware Solution private cloud should be accessing the Internet through the NVA.

Azure VMware Solution Private Cloud Sizing Calculator
AVS Deployment Series