Keep VLAN Tags When Moving Across the NSX Fabric From Your Nested Cluster
I wanted to create a nested vSphere cluster on Azure VMware Solution private cloud, but with one specific requirement. Needed that nested environment to have a VLAN backed DVS segment(s). The challenge with this requirement is that NSX-T will strip the VLAN tags from the packets when they leave the nested host.
I cannot take any credit for figuring out how to solve this problem; I must thank my colleague Joe Sarabia; this is all him. I just followed his instruction.
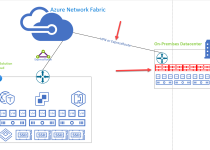
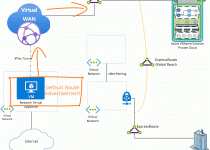
All guidance in this blog will be given within the context of the graphic below. For your environment, adjust as necessary.
Two nested ESXi hosts are running inside an Azure VMware Solution private cloud. Notice that VM1 at the bottom of the graphic is on VLAN89 port group of the nested cluster’s distributed switch. With just the default configurations, VM1 cannot get to anything, not even the gateway. On the other hand, if the nested host tries to reach its gateway or anything beyond the pfsense Router, it can. This is because VM1s packets are being VLAN tagged, the host packets are not.

To allow VM1 in the nested cluster, which is on VLAN89, to be routed by the NSX fabric successfully do the following.
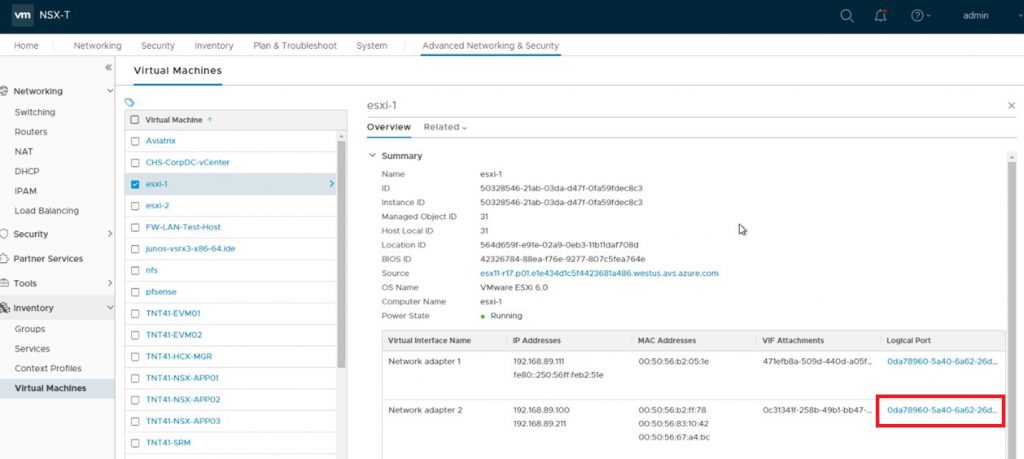
Identify the IP address of the AVS NSX Manager; in our example, it’s 192.168.8.3.
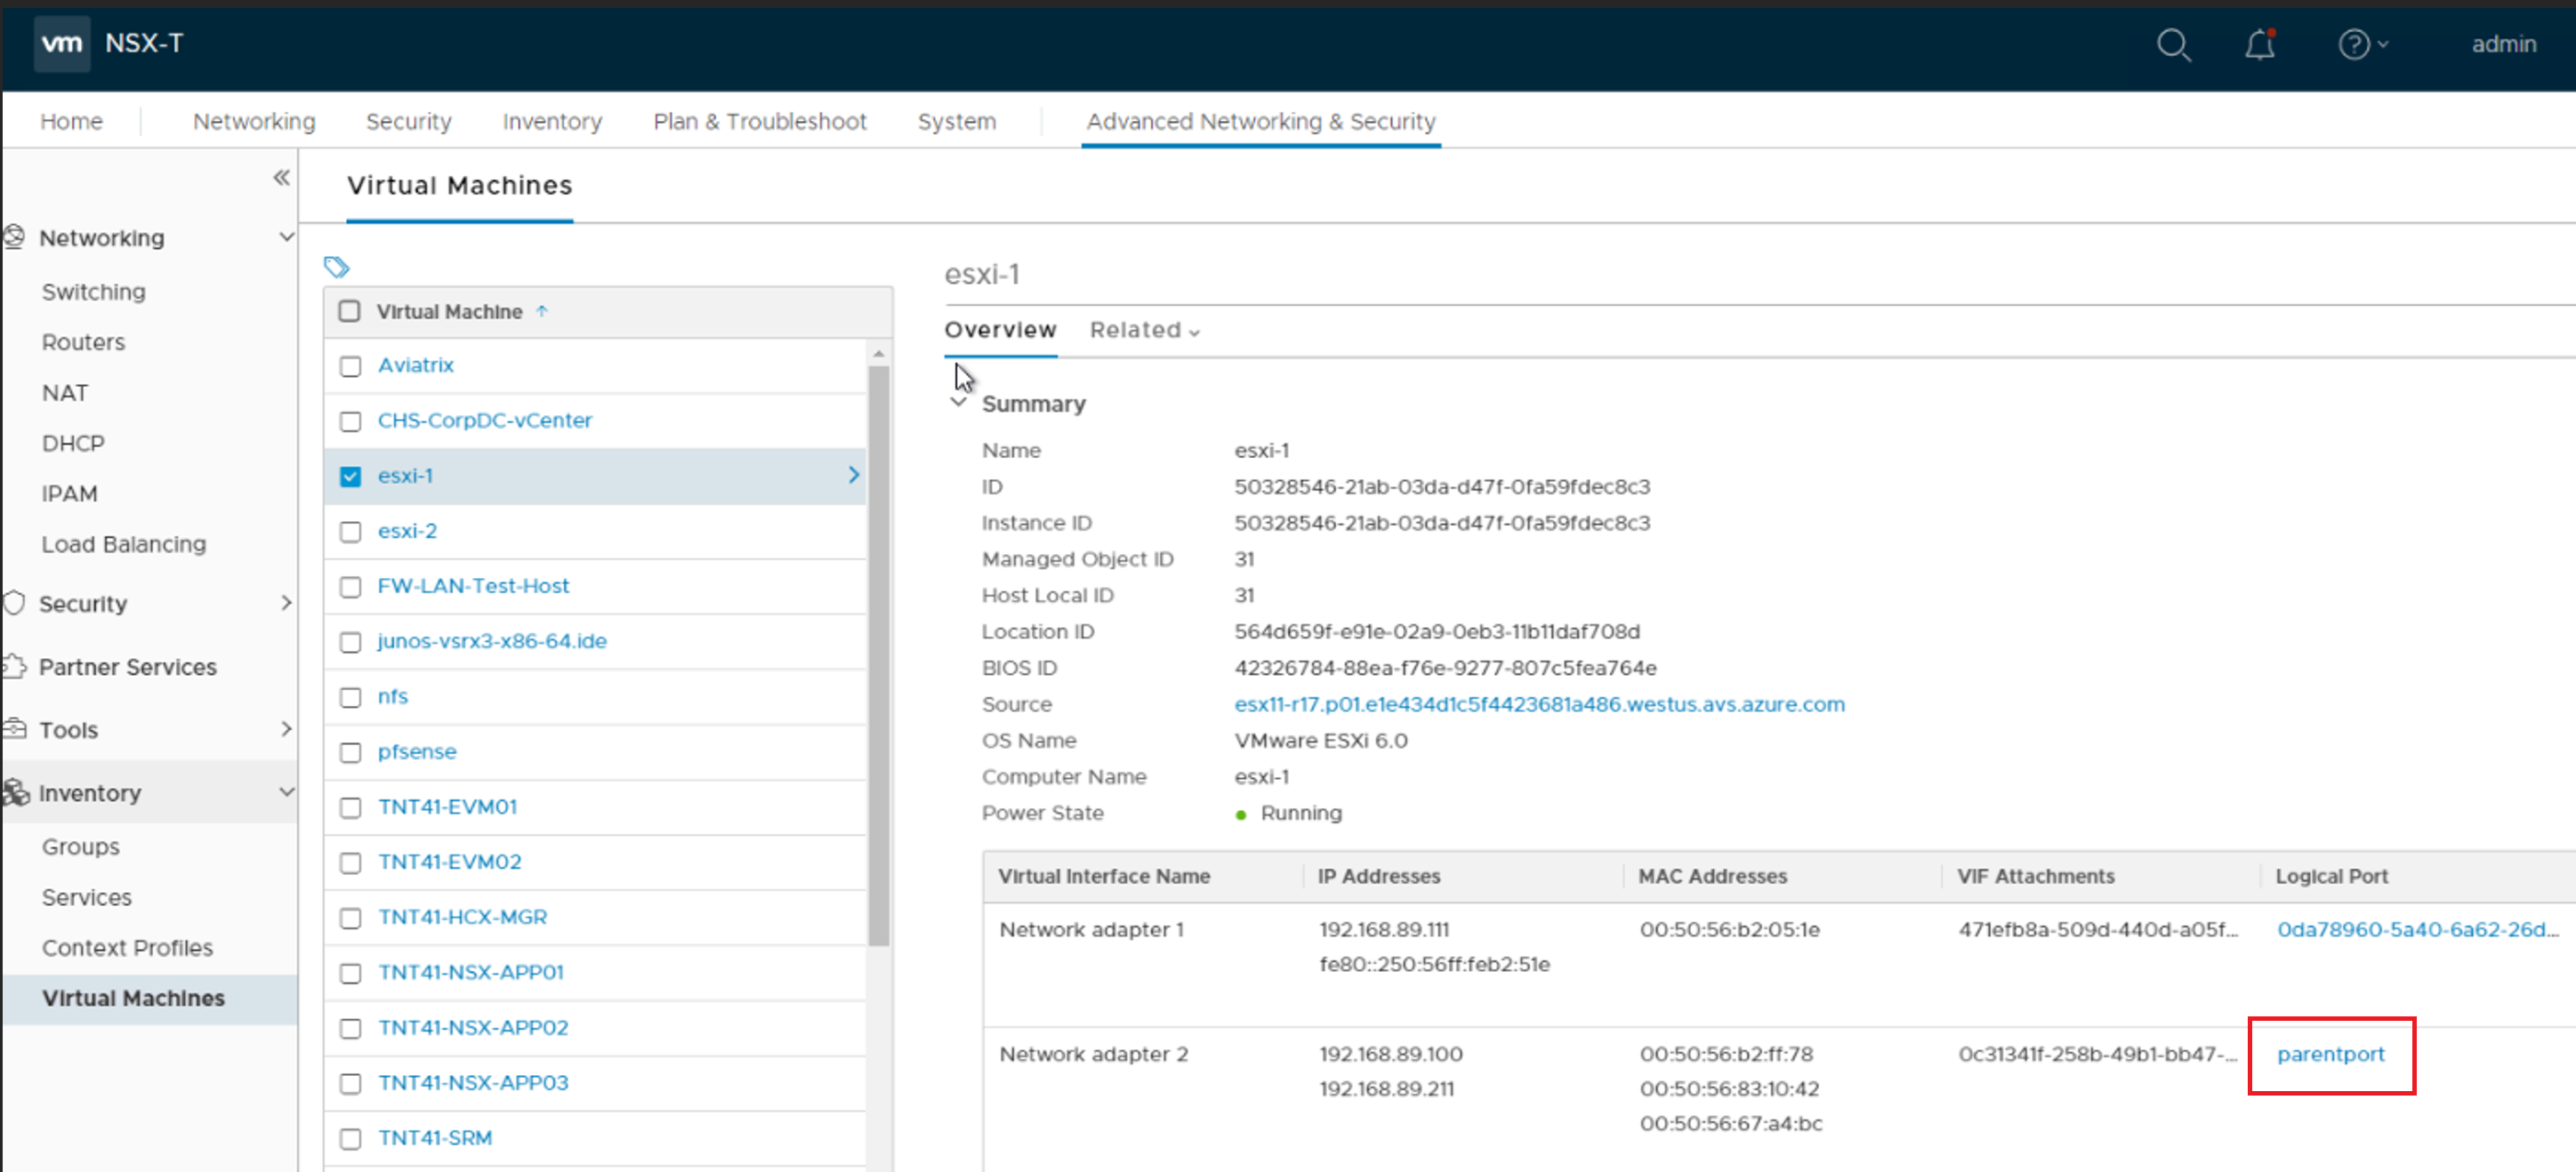
In NSX Manager, navigate to the Virtual Machine inventory and find the nested vSphere host. In this example, we are finding esxi-1 VM, which is 192.168.89.111. Network adapter 2 is the virtualized host’s adapter that is being used for the DVS Uplink Port.
Select the Logical Port hyperlink for Network Adapter 2.
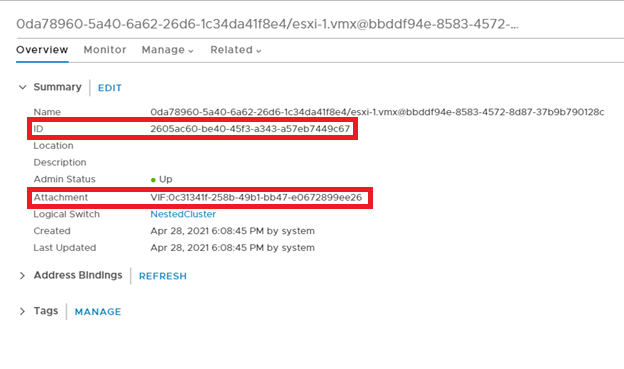
You should now see a screen like the one below, copy and set aside the ID, label this ID “Port ID”. You will need this later.
In this example it’s 2605ac60-be40-45f3-a343-a57eb7449c67. Also, copy the Attachment (leave off VIF:), label it “Port VIF”, in this example it’s 0c31341f-258b-49b1-bb47-e0672899ee26.
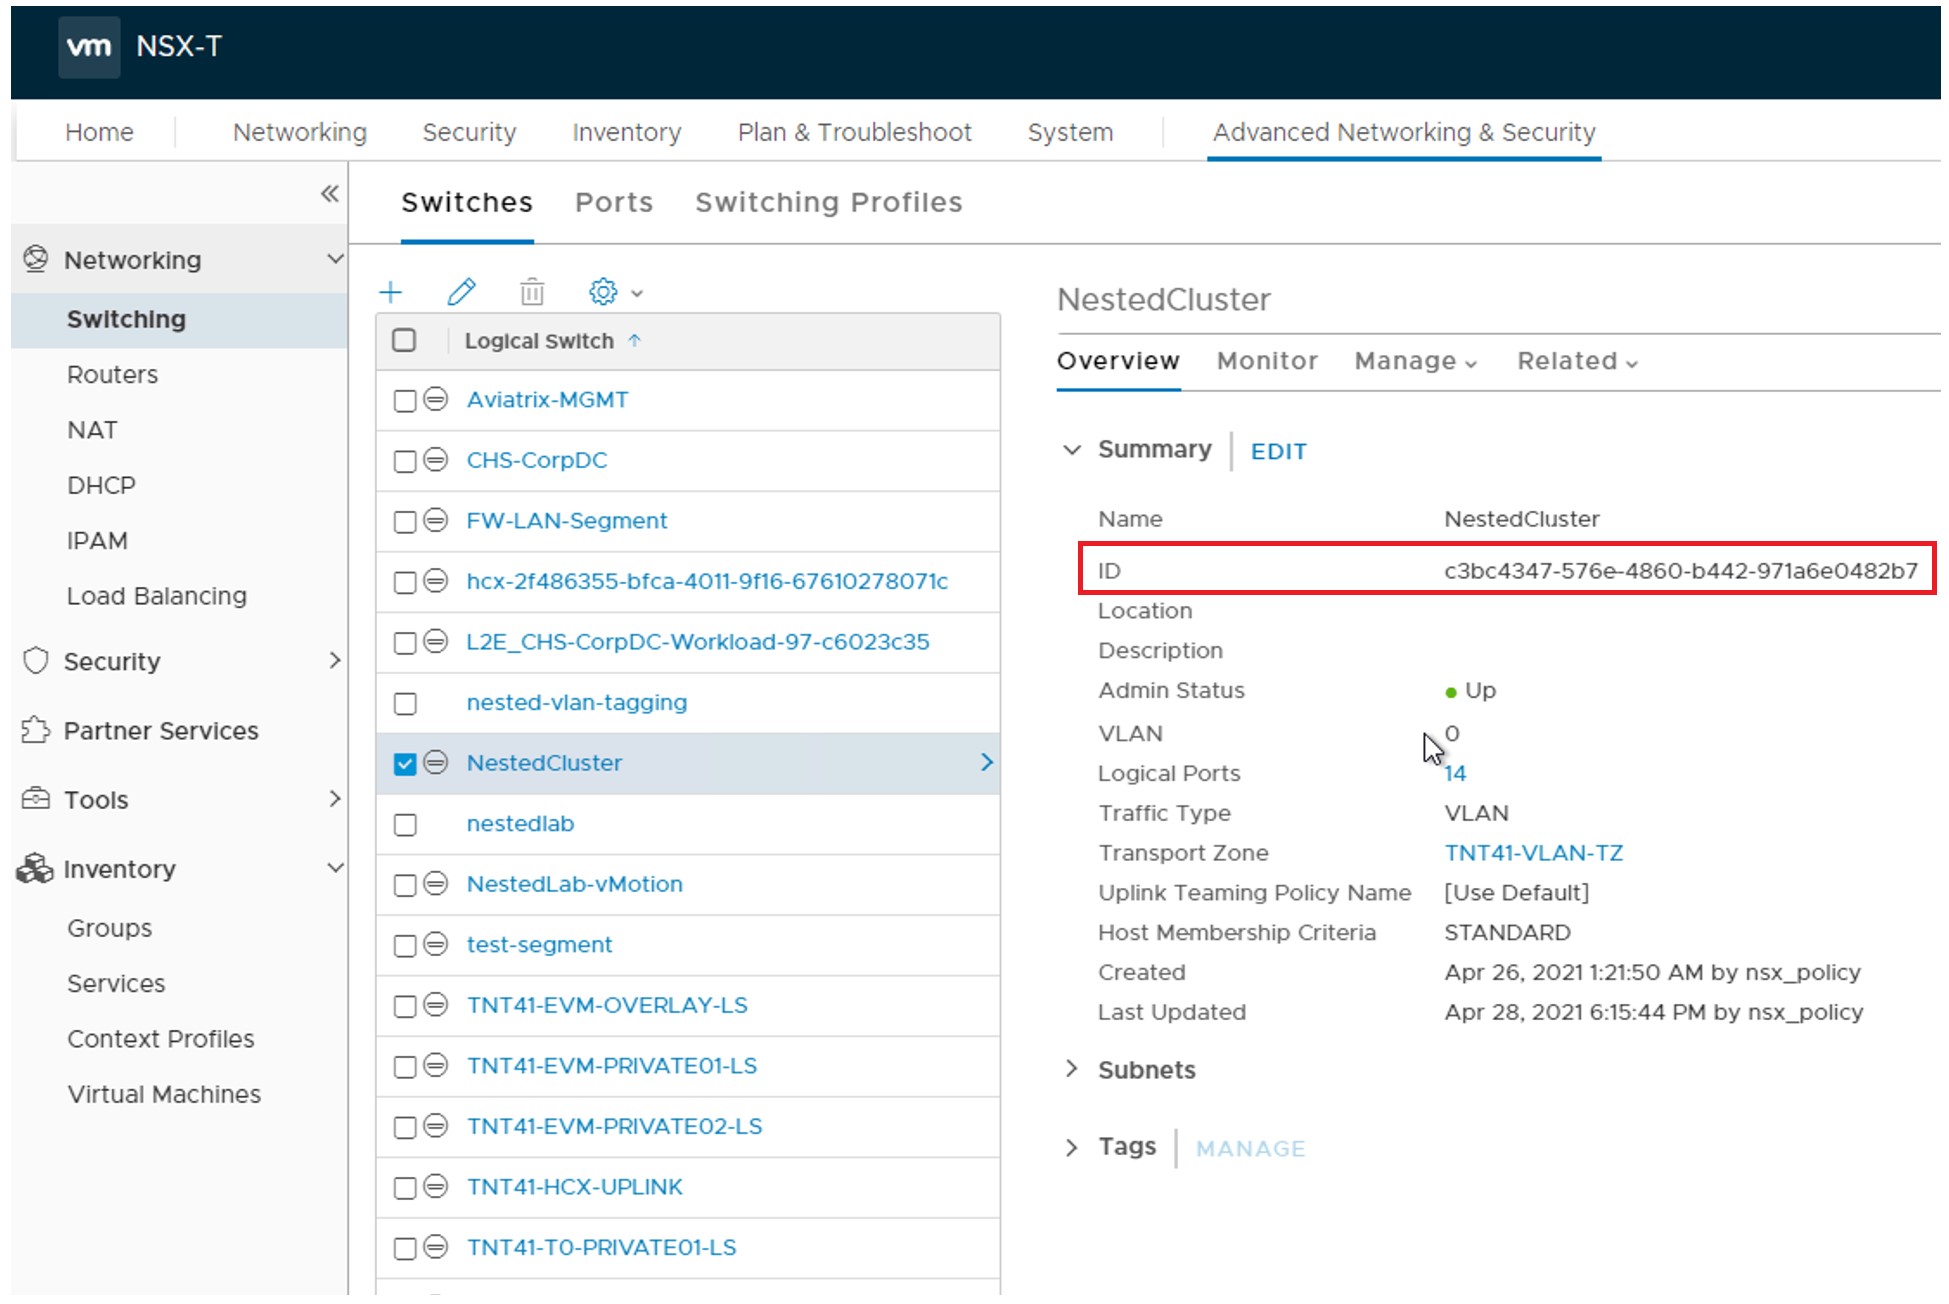
Navigate to the virtual switch where esxi-1 VM is connected. In this example, it’s the virtual switch in the graphic above, which is represented as “NSX LAN Segment”. The name of the switch is NestedCluster. Copy and set aside the ID, label the ID “Switch ID”.
In our example it’s c3bc4347-576e-4860-b442-971a6e0482b7.
At this point, you will need to use a tool like Postman to make a REST API call to AVS private cloud NSX Manager.
This step is outlined in VMware’s Configure Guest Inter-VLAN Routing doc, but what is below is all you need. Replace the bolded items with the items you have collected so far.
PUT https://<IP of NSX Manager>/api/v1/logical-ports/<Port ID>
{
"resource_type" : "LogicalPort",
"display_name" : "parentport",
"attachment" : {
"attachment_type" : "VIF",
"context" : {
"resource_type" : "VifAttachmentContext",
"vif_type": "PARENT"
},
"id" : "<Port VIF>"
},
"admin_state" : "UP",
"logical_switch_id" : "",
"_revision" : 0
}
After running the API call, notice that Network adapter 2 Logical Port is now changed to parentport.
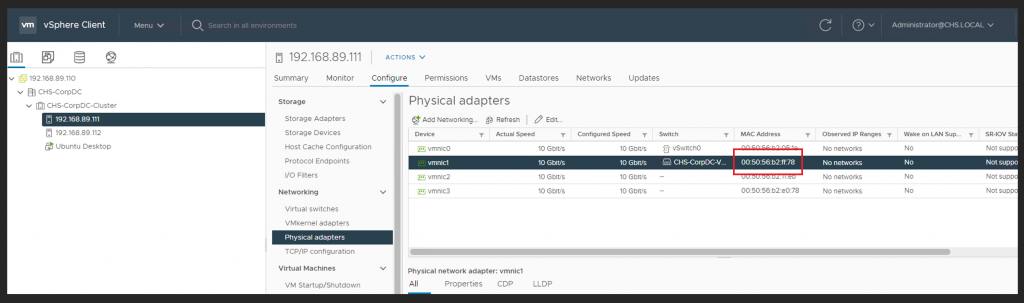
Identify the MAC Address of the nested host’s vmnic1 (which is the uplink adapter). Copy the MAC Address, set is aside and label it “vNIC MAC”.
Again, you will need to take the data you have gathered and make a REST API call to AVS private cloud NSX Manager. Replace the bolded items with the items you have collected so far.
POST https://<IP of NSX Manager>/api/v1/logical-ports/
{
"resource_type" : "LogicalPort",
"display_name" : "<any name for the port, recommend label it with the vlan number, ex. vlan89>",
"attachment" : {
"attachment_type" : "VIF",
"context" : {
"resource_type" : "VifAttachmentContext",
"parent_vif_id" : "<Port VIF>",
"traffic_tag" : <VLAN ID of the DVS Port Group>,
"app_id" : "<give any string, suggestion is paste in the Port VIF and then randomly change a few characters>",
"vif_type" : "CHILD"
},
"id" : "<give any string, suggestion is paste in the Port VIF and then randomly change a few characters>”
},
"logical_switch_id" : "<Switch ID>",
"address_bindings" : [ { "mac_address" : "<vNIC MAC>", "ip_address" : "<The Gateway Address of the VLAN>", "vlan" : “<VLAN ID of the DVS Port Group>” } ],
"admin_state" : "UP"
}
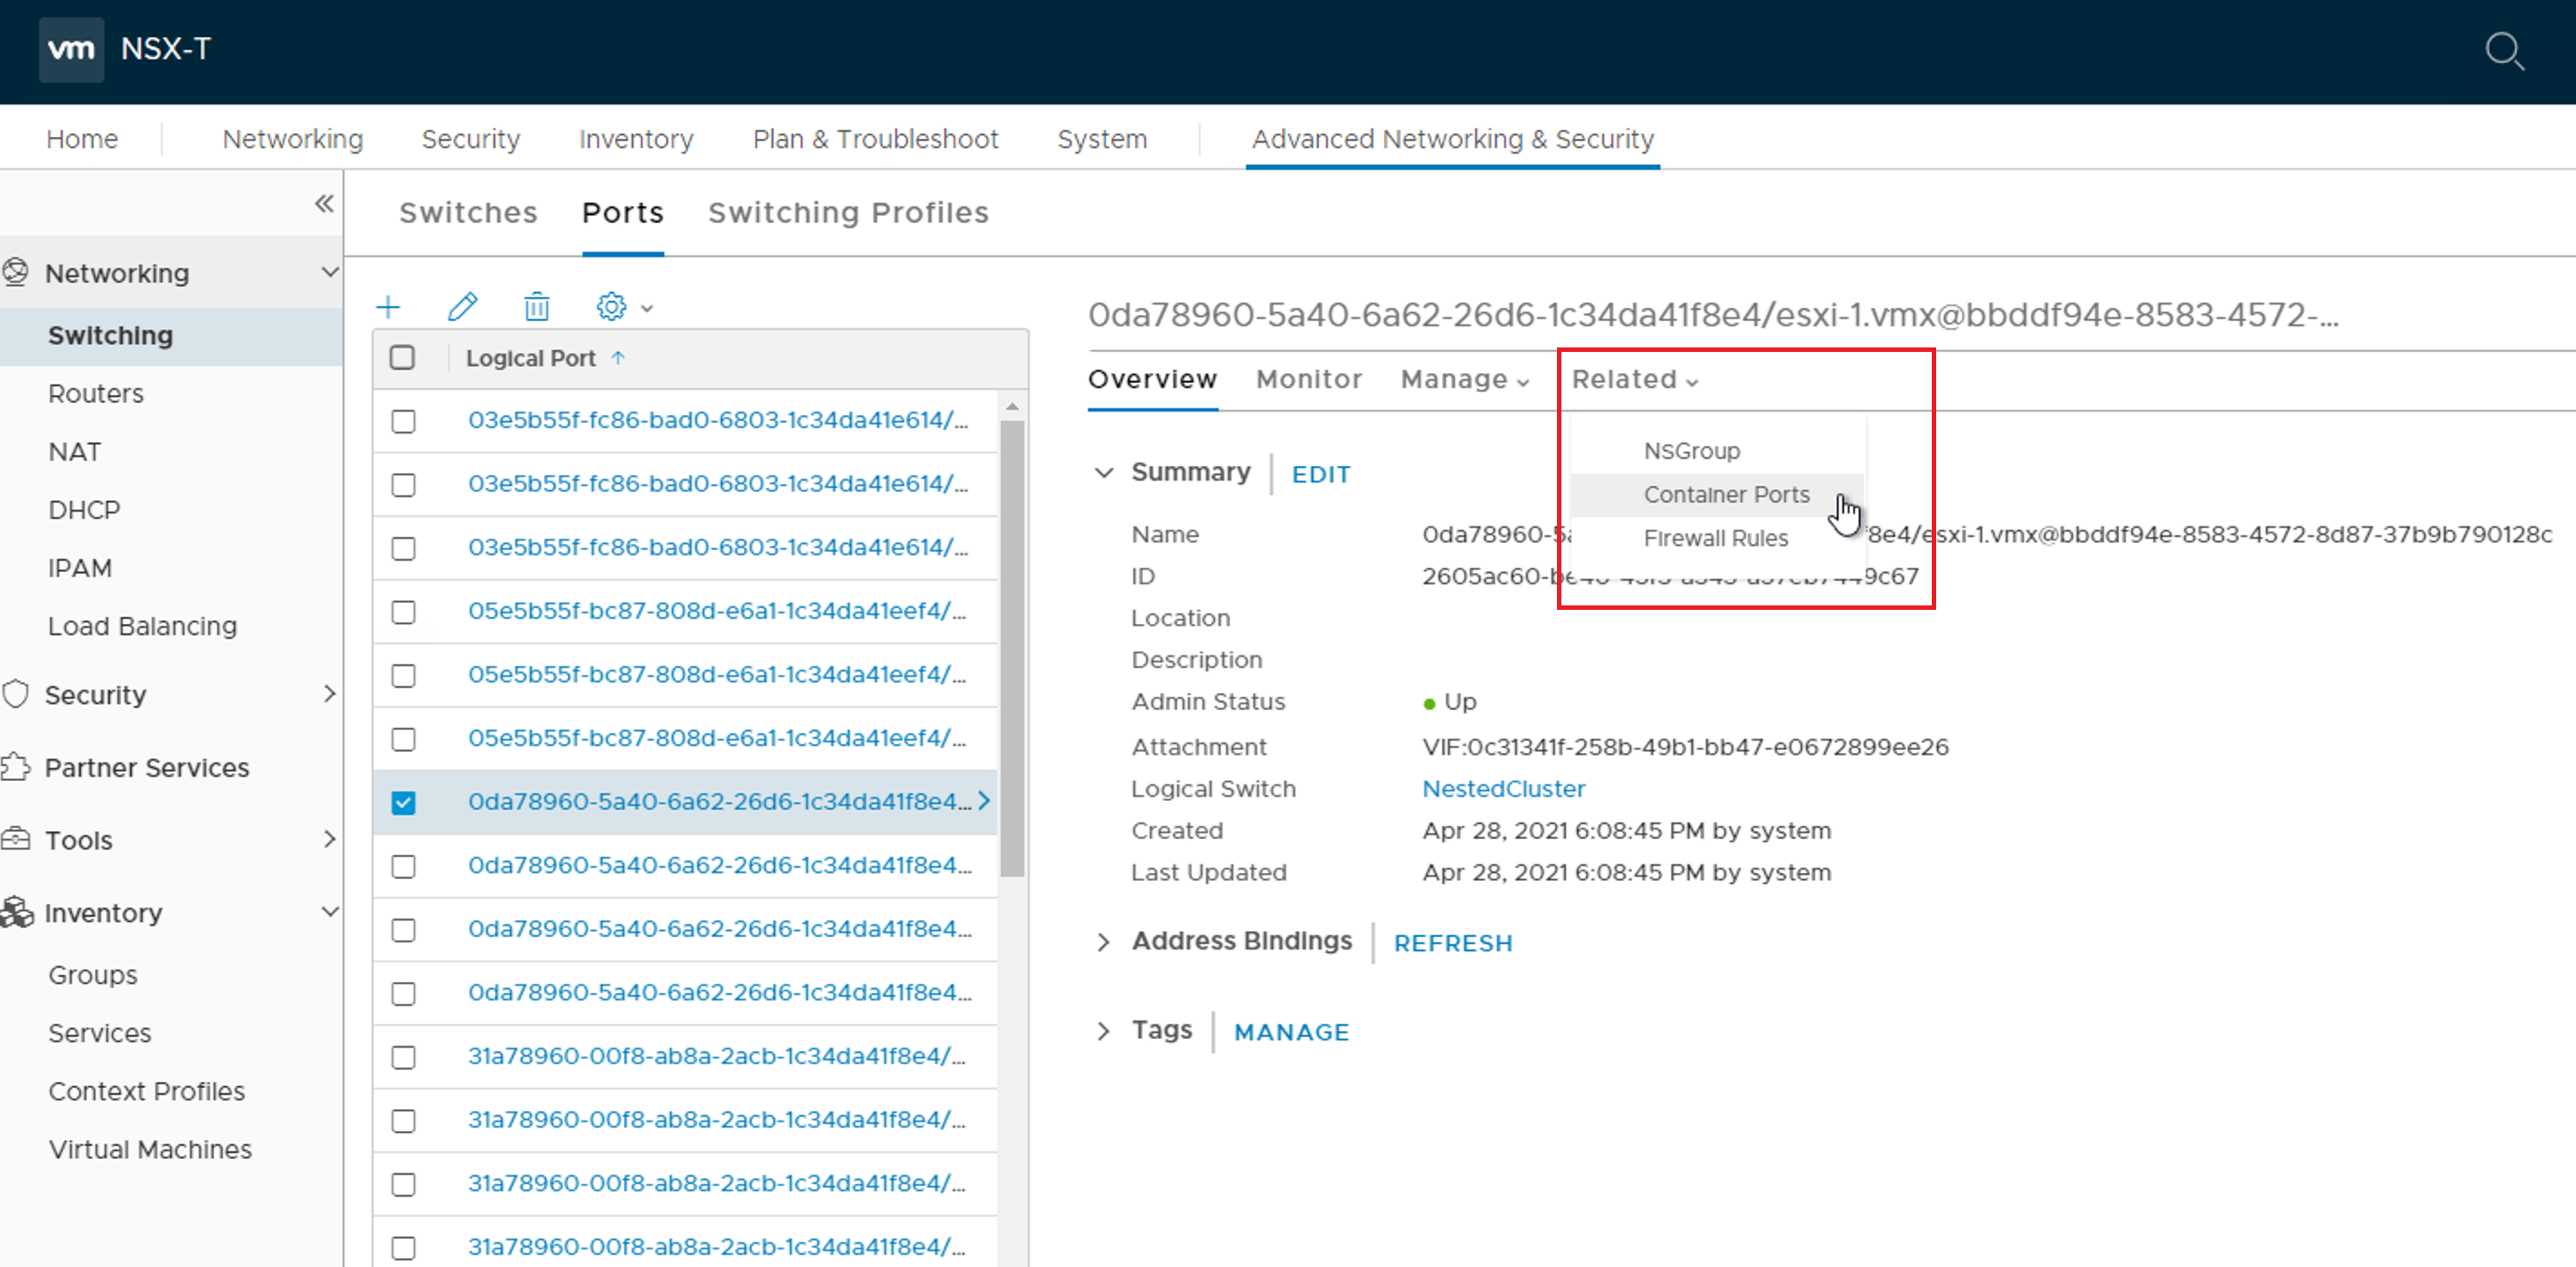
After successfully completing the second API call go back to the nested host’s parent port information as shown below, and select Related and then Container Ports.
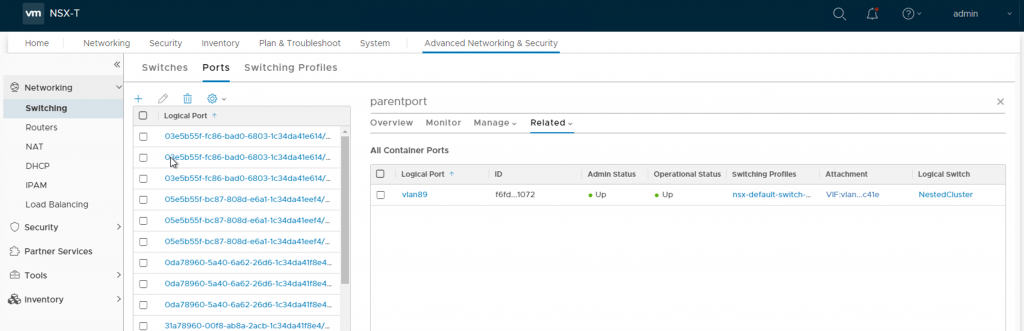
You should now see a logical port similar to what is shown below, and most importantly VM1 in the nested cluster works as it should on VLAN89.
NOTE: The process outlined above needs to be done for each and every nested host you have in the cluster. Referencing our example, if we didn’t repeat the step on the second host, as soon as VM1 vMotioned to that host, it would lose all connectivity.
Inspecting Azure VMware Solution Traffic Using a Network Virtual Appliance in an Azure Virtual Network

Fully Automated: From 0 to Migrating Workloads to Azure VMware Solution with VMware HCX