VMware Nested Virtualization and VLANs on Azure VMware Solution Using NSX Overlay Backed Segments
Nested virtualization is something that has been around for a while. As we know, VMware and the VMware ecosystem of bloggers document a lot about Nested Virtualization. If you have yet to go to William Lam’s blog, check it out; so much about nested virtualization and other great topics.
The general use case for nested environments is testing, training labs, or anything besides running something in production. VMware’s KB article Support for running ESXi as a nested virtualization solution (2009916) explains everything.
So, why am I writing this blog article?
I’ve encountered challenges with VLAN tagging virtual ports (vSwitch or DVS) in the nested environments when the VMware Cloud environment (where the nested environment lives) uses the NSX-T Overlay Backed Segments.
So why does anyone need such a thing?
Most on-premises environments still have the standard trunk ports going to the cluster and VMs deployed across multiple VLAN-based port groups in their cluster. The ability to replicate on-premises environments within a nested environment that is deployed to a VMware cluster with only NSX-T Overlay segments is critical to testing and replicating migration scenarios effectively.
The picture below shows what we are building.
Overview of Environment Being Built
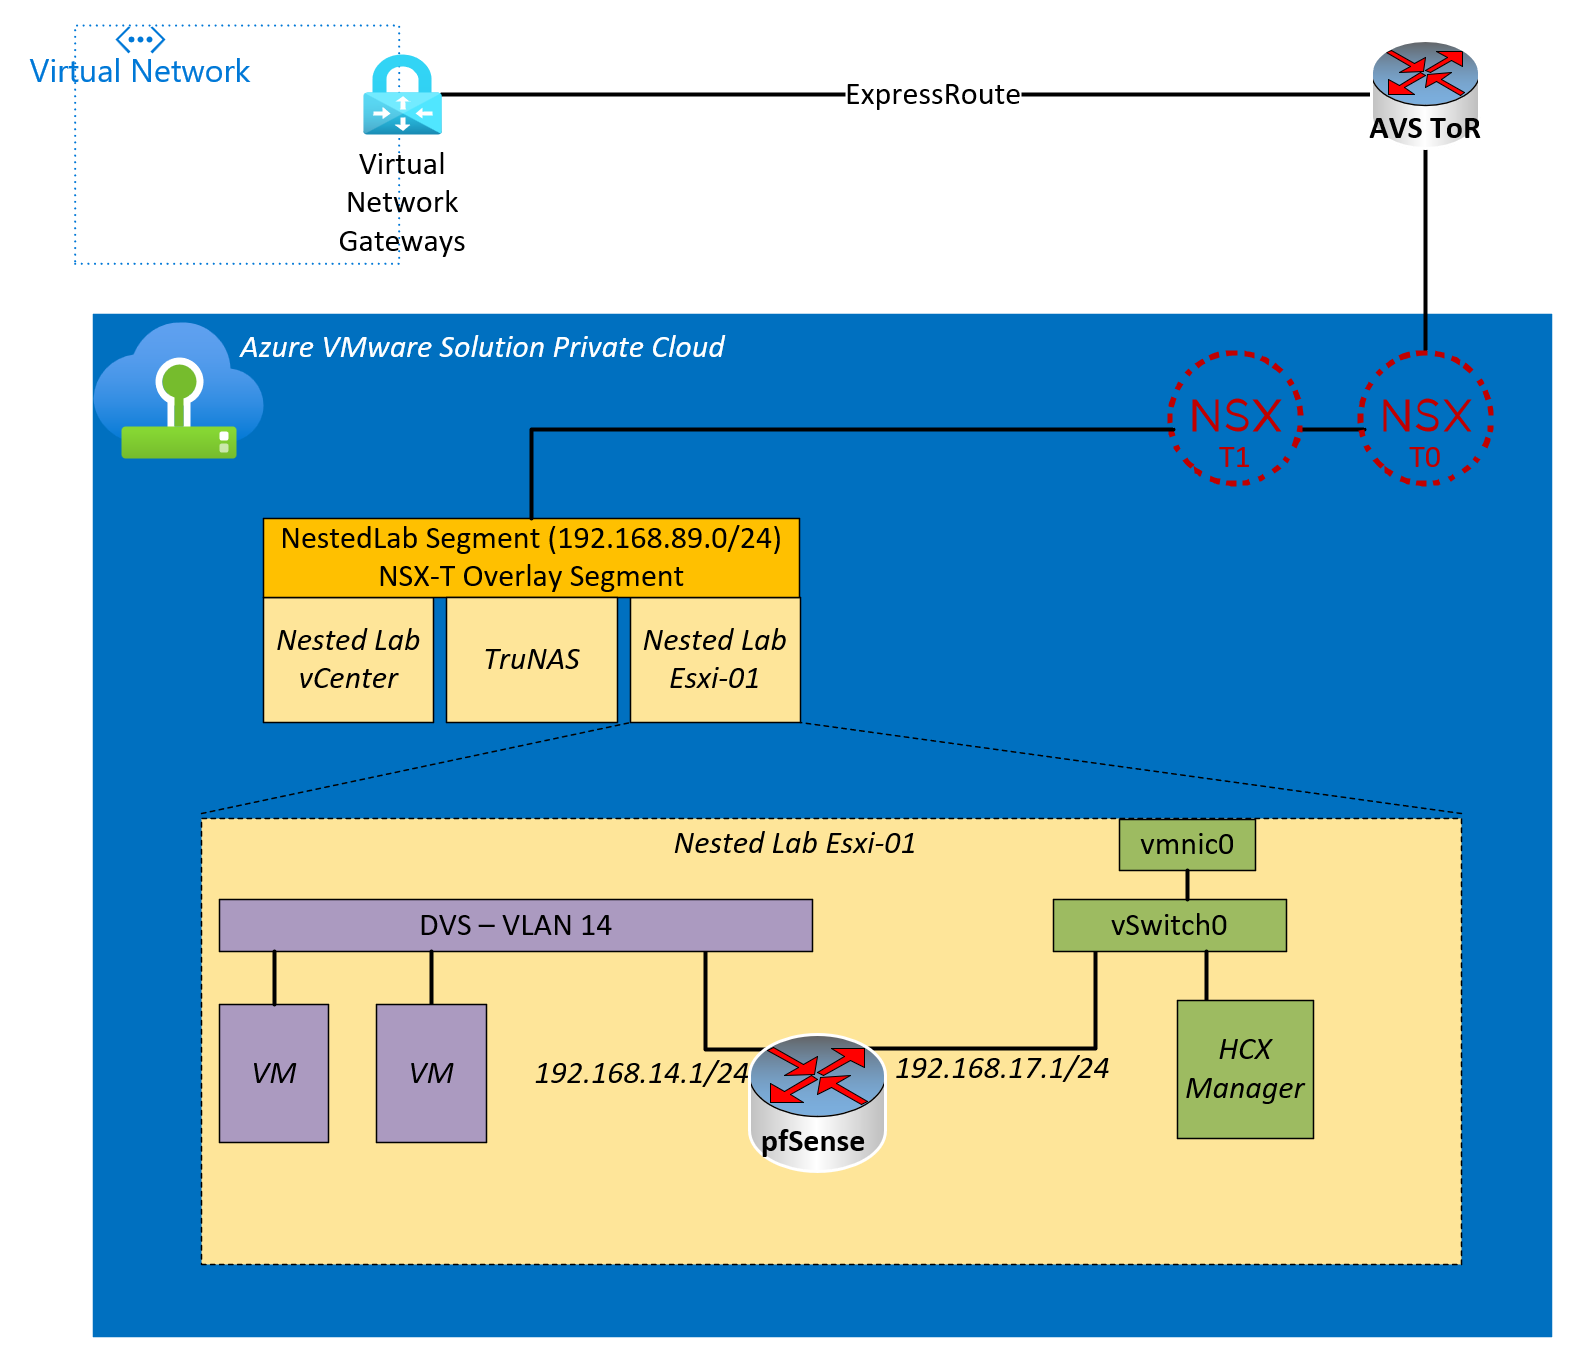
Above, you will see an NSX-T Overlay segment with three VMs that supports the nested environment. The VMs are vCenter, ESXi host, and TruNAS appliance for the nested cluster’s shared storage. In reality, there isn’t a need for shared storage in this example, but it’s handy when using multiple nested ESXi hosts.
The large yellow square shows a blowup of the nested ESXi host. Because the pfSense is in the middle, the VLAN tags are getting stripped, and therefore, the VMs on VLAN14 can communicate with resources outside the cluster.
Within the context of HCX, we now have a VLAN-based port group that can extend from on-prem (the nested environment) to the cloud (Azure VMware Solution Private Cloud).
Now let’s build it.
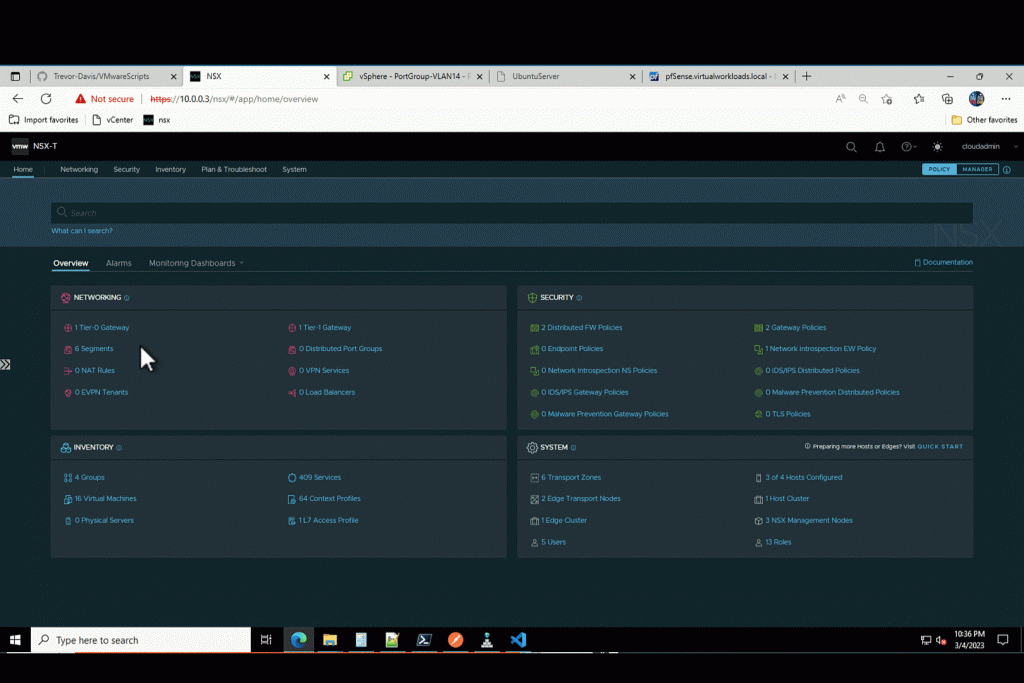
Create NSX-T Segment
The NestedLab NSX-T segment can be any IP space you want. Instructions to create the NSX-T segment on an Azure VMware Solution private are here.
Deploy Nested vCenter Server
You could use this script to deploy from a vCenter ISO or any other method.
https://github.com/Trevor-Davis/VMwareScripts/blob/main/deploynestedvcenter.ps1
Deploy Nested ESXi Host
I suggest going to William Lam’s site and grabbing an ESXi OVA of choice.
https://williamlam.com/nested-virtualization/nested-esxi-virtual-appliance
Deploy TruNAS
This is a great tutorial on how to get the TruNAS deployed and configured.
Create the Nested Cluster
At this point, you will want to log into your nested vCenter, add the nested host(s) and create your cluster.
Configure Nested Cluster Networking
Create a port group on vSwitch0; later, we will attach the WAN interface of the pfSense router to this port group.
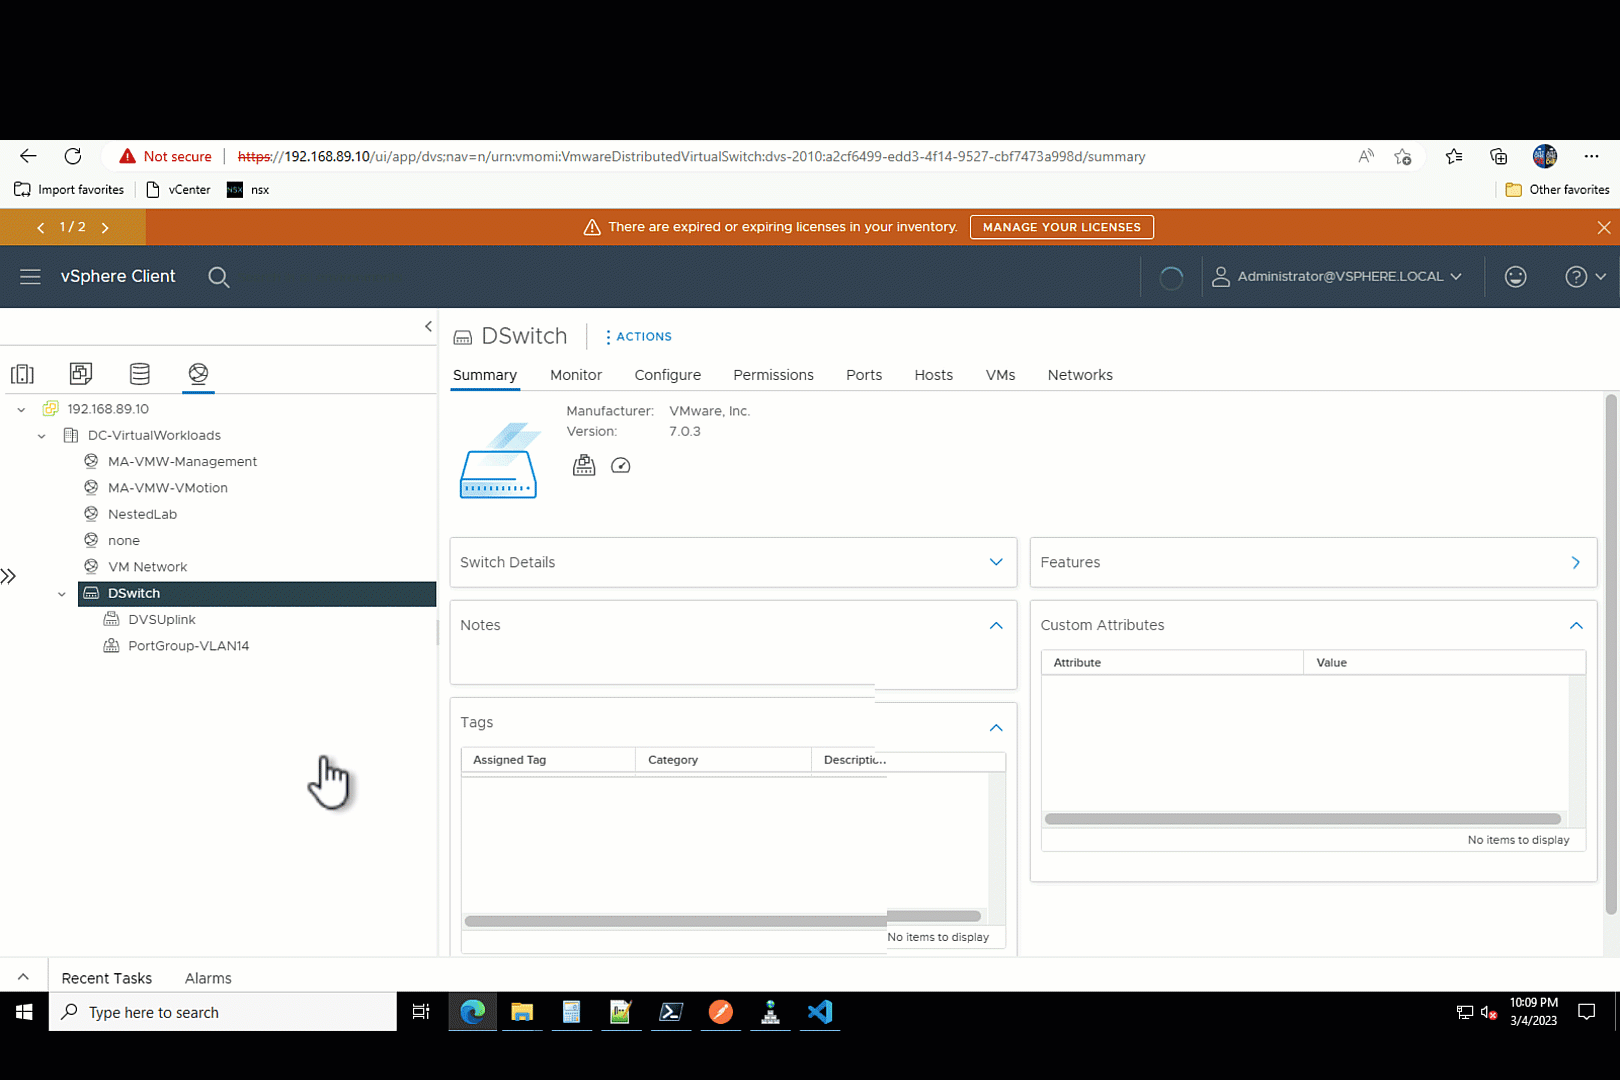
Create a Virtual Distributed Switch, but do not attach the Uplink to any NICs. Then configure the port for the VDS to be on whatever VLAN you choose, in this example, we are using VLAN 14.
Deploy pfSense
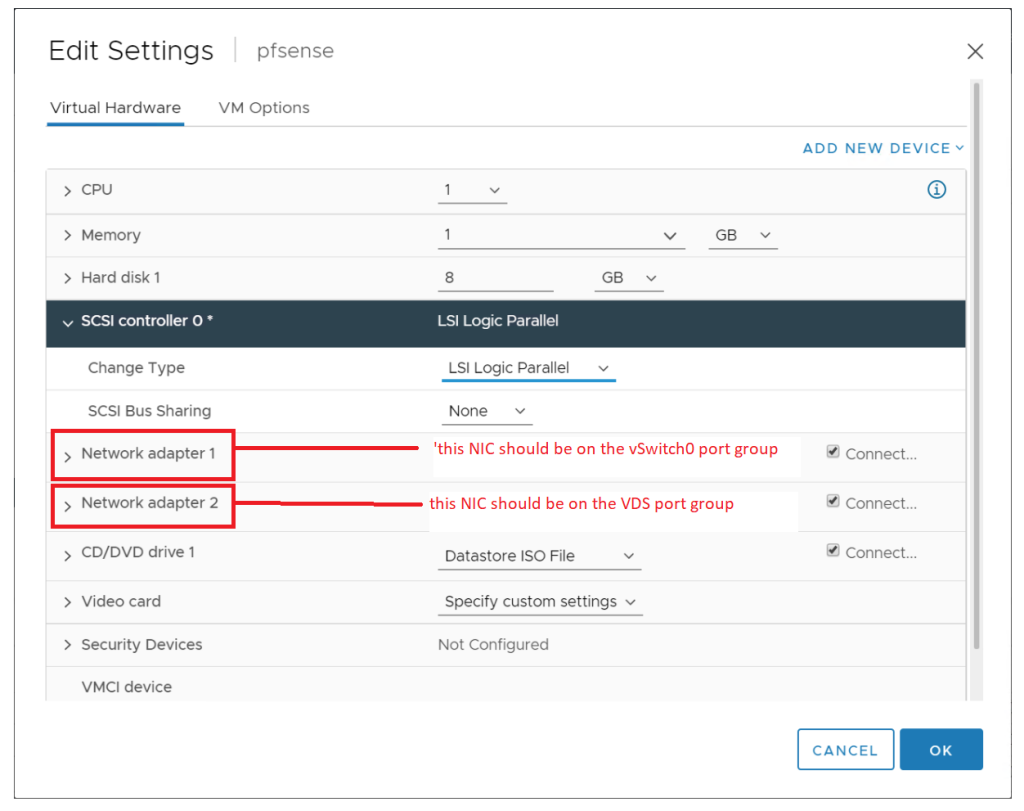
Deploy the pfSense router using this tutorial, but with the following modification.
When you reach the network configuration screen, put network adapter 1 on the port group you created on vSwitch0 and network adapter 2 on the VDS port group you created in the previous step.
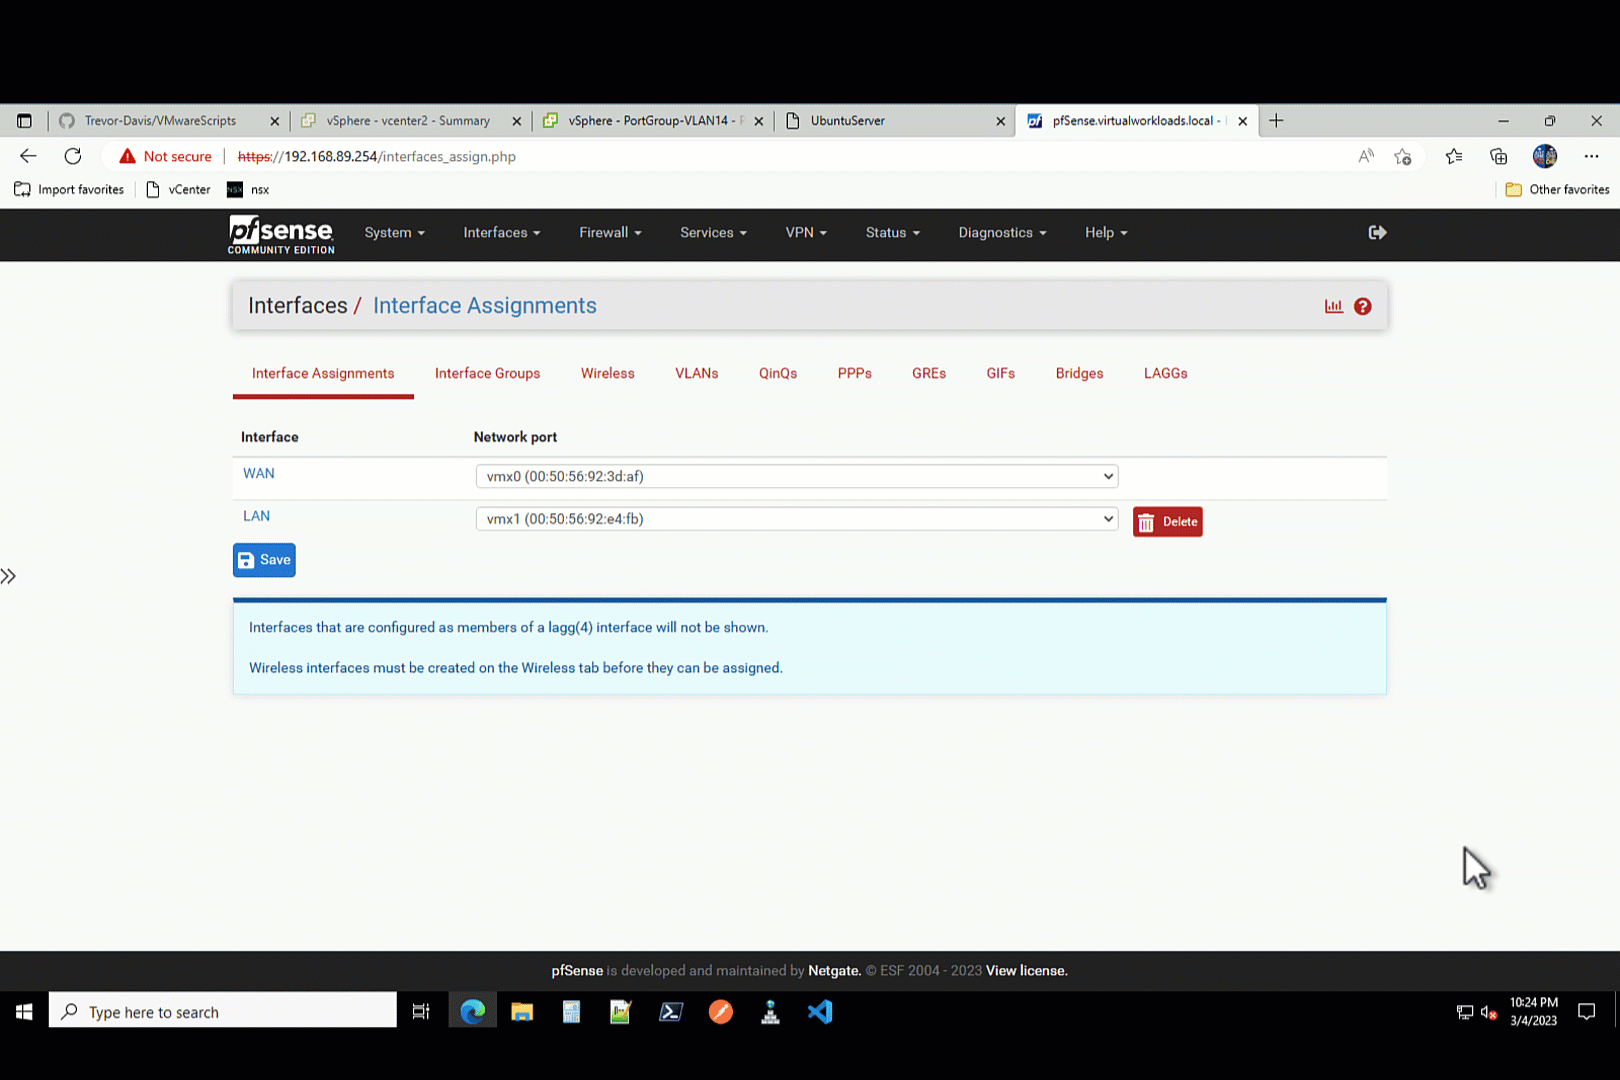
Create Trunkport
Modify the port on the VDS where the pfSense adapter is attached to a VLAN Trunk Port.
Create pfSense VLAN
Now we need to set up the pfSense with a VLAN-backed network. We will be configuring VLAN 14 and assigning it to the LAN port. The LAN port on the pfSense is connected to the VDS trunk port we modified in the previous step.
Create NSX-T Static Routes
Because the NSX-T T1 does not own the VLAN networks, as they are behind the internal interface of the pfSense, we need to add static routes to the NSX-T T1. When we do this, those VLAN networks are put into the BGP advertisements coming out of NSX-T T0 to the physical world.
The static route to the pfSense VLAN network needs to be the external interface of the pfSense. The external interface of the pfSense is the NIC attached to the NSX-T Overlay Network.
Conclusion
Now, just deploy VMs to the nested environment and put them onto the VDS.
In our scenario using Azure VMware Solution, we just created an “on-prem” environment that we can use for migration testing to the Azure VMware Solution Private Cloud.

Azure VMware Solution: Internet Egress via Azure
VMware NSX-T DHCP Relay for AVS Workloads