Azure VMware Solution: DHCP On Layer-2 Stretched VMware HCX Networks
Challenge
By default, DHCP will not work for VMs on the HCX L2 stretch network in Azure VMware Solution when the DHCP server lives in the organization’s on-premises datacenter. By default, NSX will block all DHCP requests from traversing the L2 stretch. But not to worry, this is a straightforward solution.
Step 1: Get Destination Network Name
Go to the source vCenter (typically on-prem) and find the network extension which needs to support DHCP requests from AVS to On-Prem. Take note of the destination network name.

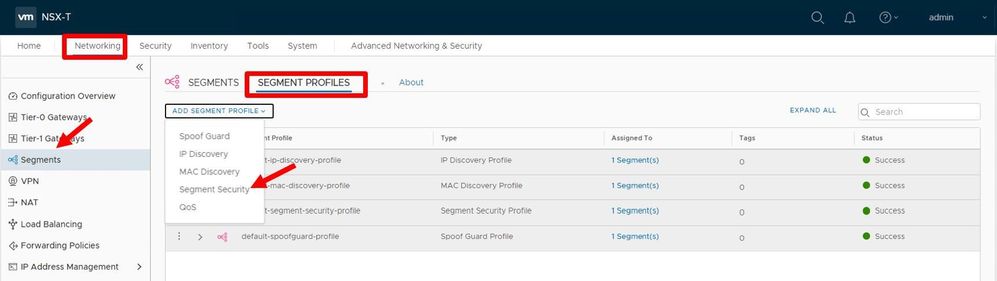
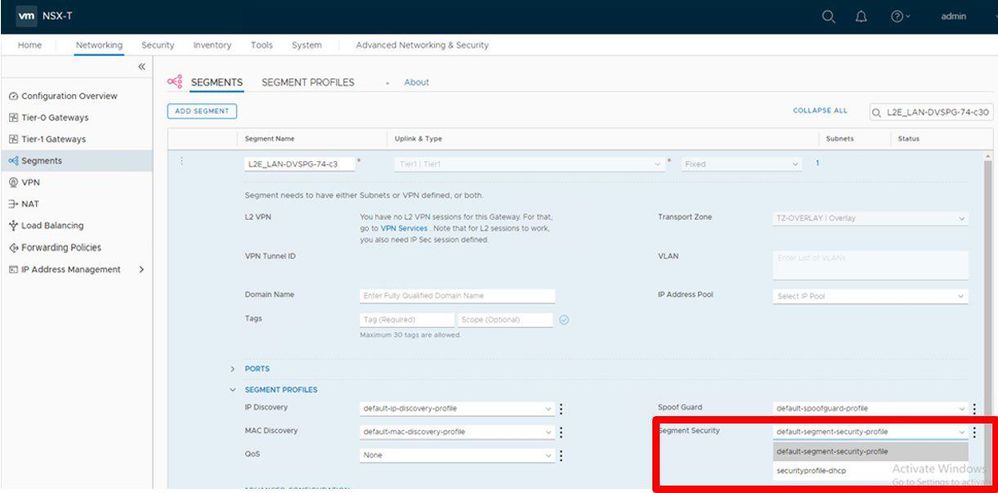
Step 2: Create a Segment Security Profile
Log in to the NSX Manager in AVS. Navigate to Networking, Segments, Segment Profiles, and then Add Segment Profile. You will need to choose the Segment Security profile.
Step 3
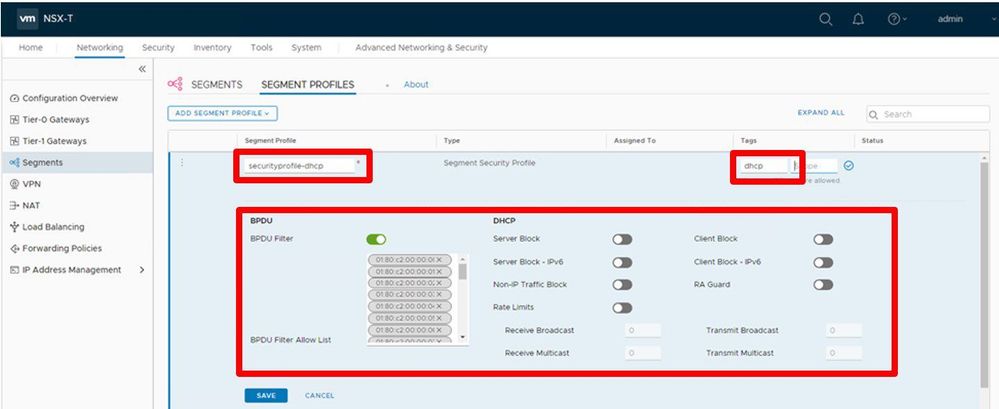
Part 1: Configure the Segment Security Profile
Assign a name and a tag to the profile, then make all the toggles look exactly as shown in this picture.
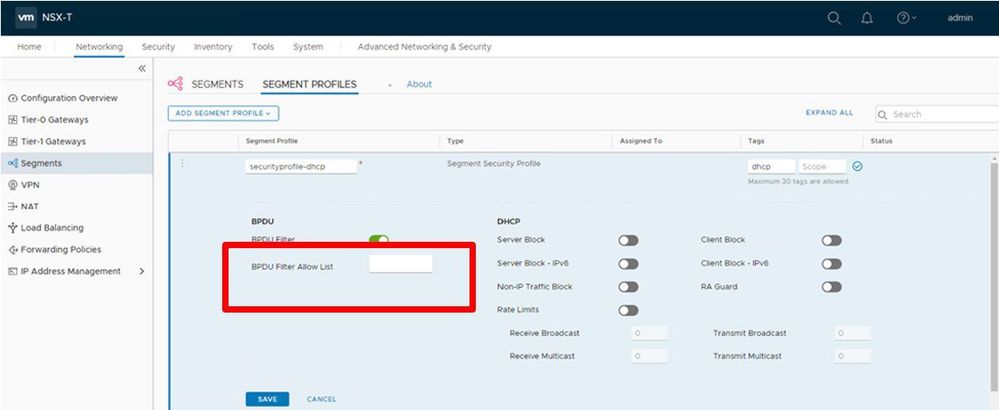
Part 2: Configure the Segment Security Profile
In this step, you will need to remove all the MAC addresses (if any) listed in the BPDU Filter Allow List. After removing, your screen should look exactly as it does in this picture.
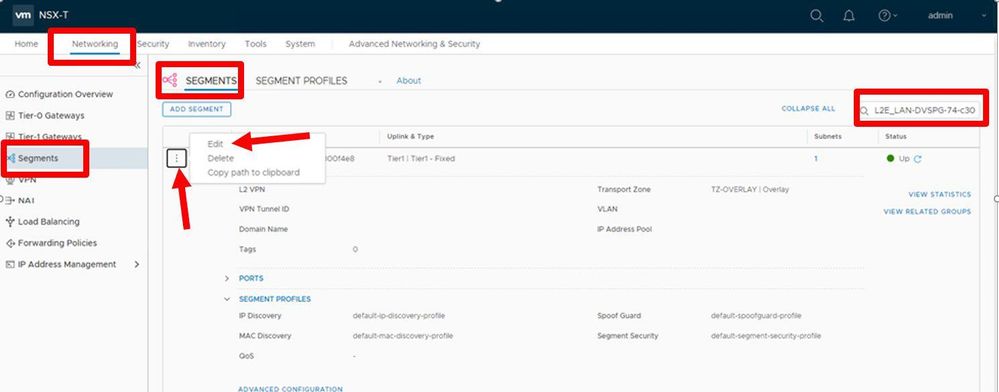
Step 4: Edit the Network Segment
Go back to the Networking Tab, choose Segments on the left column, Segments, then in the search area on the right, enter the network’s name (from step 1). The search should then find the network; when it does, edit the segment by choosing the 3 button icon and select Edit.
Step 5: Change the Segment Security
Change the Segment Security option from whatever it is currently to the item you created in step 3, part 2. Save the configuration.
Conclusion
That’s it, by modifying the AVS NSX configuration, DHCP requests will now be sent from the VM in AVS on the L2 stretch back to the on-prem DHCP server.
Azure VMware Solution “Ingredients”: Secure Communications Between AVS and On-Premises Using On-Premises Firewall

Deploy Arc for Azure VMware Solution Simply Using PowerShell